Create a virtual machine (Advanced Console): Difference between revisions
No edit summary |
No edit summary |
||
| Line 43: | Line 43: | ||
[[File: | [[File:Cloud_Instances3.png|border|400px]] | ||
Revision as of 17:16, 15 May 2024
This article will help you create a new virtual machine (or instance).
In the DataTenant Cloud, a virtual machine is called an 'instance'. This article will guide you on creating a new instance.
Prerequisites
In order to have a successful instance build, you'll want to make sure you have a few things squared away first.
- Ensure you have a keypair available to use. Your keypair will be used to grant you access to the virtual machine after it's been created.
- If you need help creating a keypair, please review our Create a keypair article.
- Ensure you have an acceptable security group created for your network purposes.
- If you want, you can accept the 'default' security group to get started and edit this later. But, best practice will always be to ensure you have a security group set up in advance and select it during provisioning. For help doing this, please review our Create or edit a security group article.
- Create a boot volume.
- You must provision a boot volume in advance or your instance creation will fail. To do this, please review our Create a volume article.
- Create a network port (optional)
- You can opt to have a network port auto-created during the instance creation process, but the IP address for the instance will be assigned at random. If you want to set a static IP address, please follow our article Create a network port.
Create a virtual machine (instance)
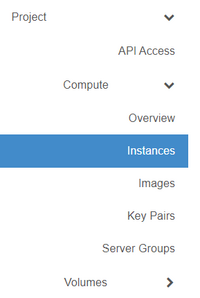
Login to the DataTenant Cloud. Navigate to the Project, Compute, Instances menu.
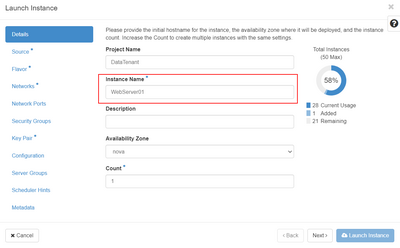
Click 'Launch Instance'.
Give your new instance a unique name. For instances other than virtual appliances, the name you provide here will be set as the hostname in the resulting instance OS.
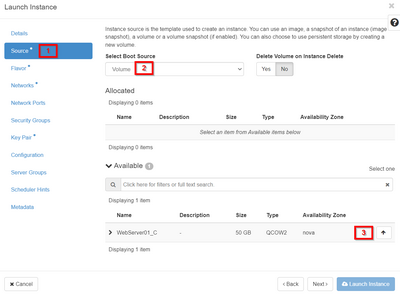
Click on 'Source'. In the 'Select Boot Source' menu, choose 'Volume'. Select the volume you provisioned earlier.
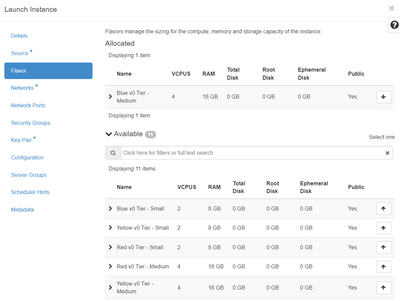
Click on 'Flavor'. Choose whichever flavor will work best for your new instance. If you need help choosing, please review our Understanding flavors article.
For networking, you have two options:
- If you did not provision a network port in advance, click 'Networks' and choose the network you'd like your new instance to be connected to. A network port will be auto-created for you with a random IP address from that network.
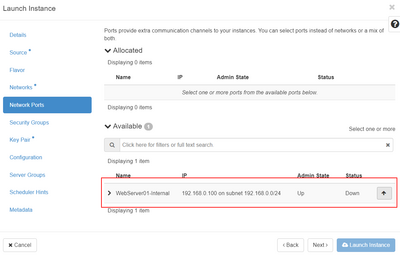
- If you did provision a network port in advance, click 'Network Ports' and select the port you created.
wef
