Create a network port (Advanced Console)
This article will help you create a static network port.
Network ports are virtual interfaces that can be connected to virtual machines or virtual routers. The DataTenant Cloud can auto-create these network ports for you when you create a new virtual machine or virtual router, but if you prefer to pre-create your own network ports with static IP addresses, this article will illustrate how to do that.
NOTE: Static network ports can only be created on private networks in your project. Static ports cannot be pre-provisioned in shared networks, like the Public Internet network. In order to join a virtual machine/instance directly to the public internet, please review the Join an virtual machine to a network article.
Create a network port
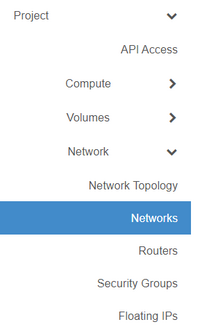
Login to the DataTenant Cloud. Navigate to the Project, Network, Networks menu.
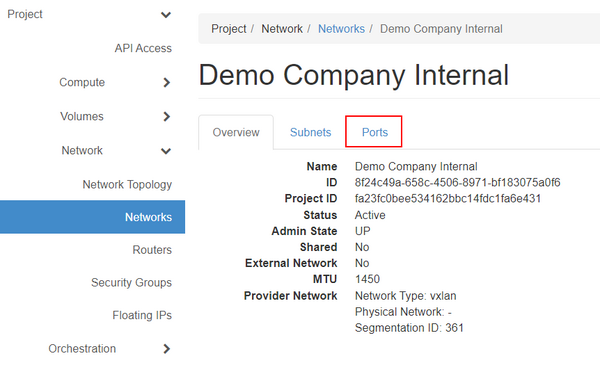
You will be provided a list of networks that are available in your project. Click on the network you want to make your port in.
Click on the 'Ports' tab.
Click 'Create Port'.
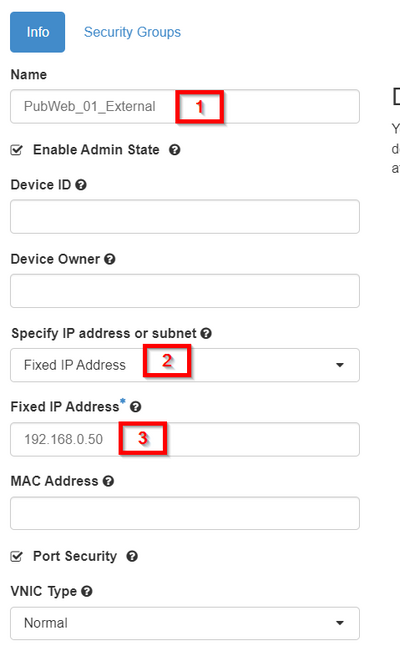
Give your network port a unique name. For example, a new web server network port might have a name like 'PubWeb_01_External'. In the 'Specify IP address or subnet' dropdown, choose 'Fixed IP Address'. Enter the static IP address you want to be bound to this port.
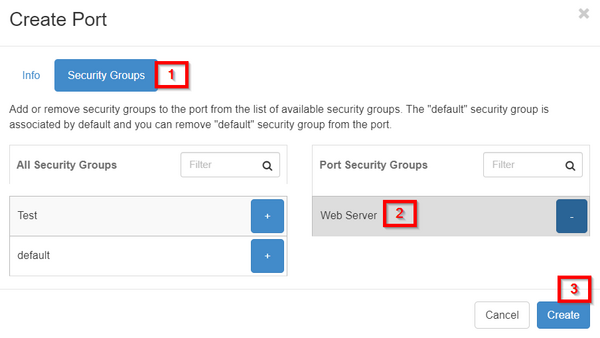
Click the 'Security Groups' tab and select the security group you'd like this new port to be a member of. If you need help creating or editing a security group for this port, please review the Create or edit a security group article.
When you've set the security groups, click 'Create'.
Your new network port is now created and available to select when provisioning a new virtual machine (or for attaching to an existing virtual machine). If you need help attaching a network port to an existing virtual machine, please review the Attach a network port to a virtual machine article.


